How to Scan Cover Art: Difference between revisions
Mfmeulenbelt (talk | contribs) (Created page with "This is a guide for scanning and editing cover art with [http://www.gimp.org/ GIMP]. I also use the [http://registry.gimp.org/node/27986 Resynthesizer plugin] for GIMP. You ...") |
Mfmeulenbelt (talk | contribs) No edit summary |
||
| Line 20: | Line 20: | ||
<br /> |
<br /> |
||
When you zoom out again, you’ll notice that some bits are missing. Image → Autocrop Image will solve that problem.<br /> |
When you zoom out again, you’ll notice that some bits are missing. Image → Autocrop Image will solve that problem.<br /> |
||
[[File:scanning4]]<br /> |
[[File:scanning4.png]]<br /> |
||
<br /> |
<br /> |
||
Revision as of 07:46, 21 September 2015
This is a guide for scanning and editing cover art with GIMP. I also use the Resynthesizer plugin for GIMP.
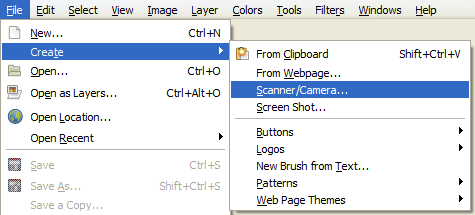
You can scan images right from the GIMP. Go to File → Create → Scanner/Camera…

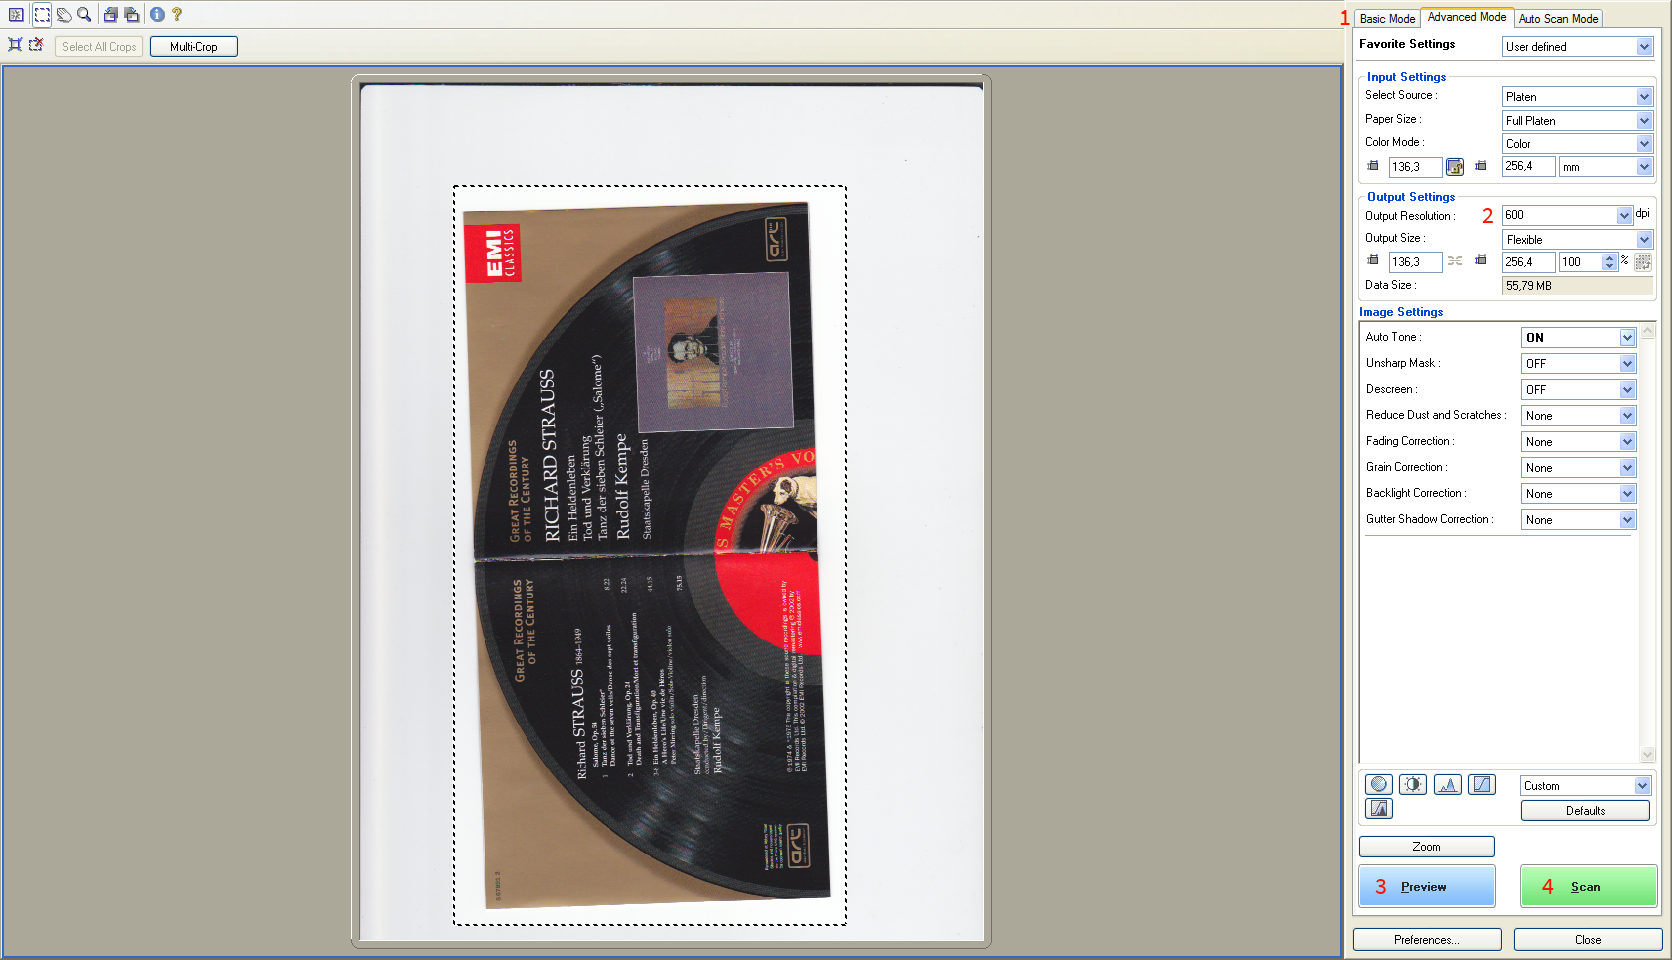
After (optionally) selecting your scanner as the source, you’ll be presented with a new screen:

To the right, click on the tab Advanced Mode (1). Set the Output Resolution to 600 dpi (2), then click on Preview (3).
Some points:
- I usually don’t bother with neatly aligning what I am scanning on the scanner, I just rotate it afterwards.
- Scanning at 600 dpi may seem overkill, but in my experience scanning at a high resolution is the best way to avoid moiré patterns (Wikipedia). Scanning in this resolution doesn’t take that much longer on a modern scanner, but it does create large files to work with, which may create problems on computers with low RAM.
- After completing the preview scan, GIMP automatically selects a part of the scanning area to use for the real scan. I usually find that selection to be a bit tight though, so I always draw a slightly bigger one.
- The options under Image Settings give some possibilities for automatic adjustments. I prefer to do those myself later, so I usually leave them off.
When you’re satisfied with all the settings, click Scan (4).
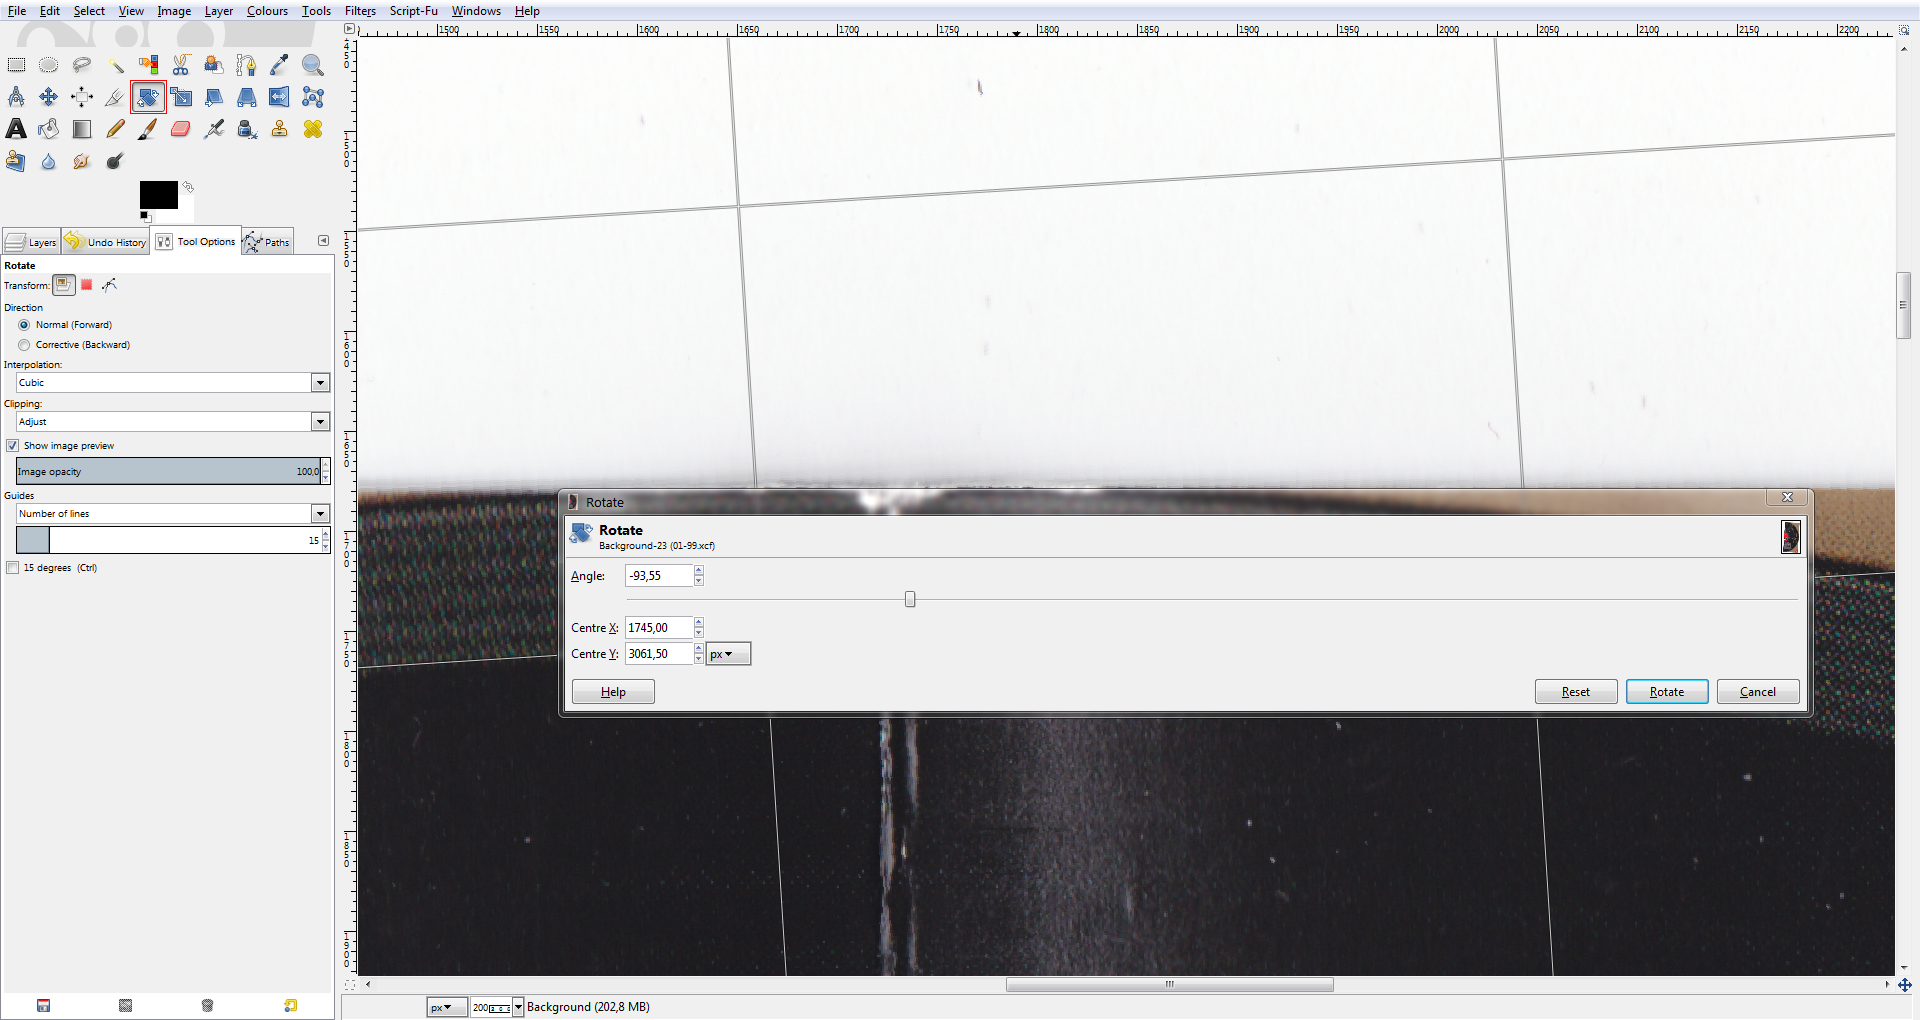
If the image is not yet horizontal, you can rotate the image with the Rotate Tool (highlighted) and dragging anywhere on the image. Aligning is quite easy if you zoom in and use the Rotate dialogue as a ruler along with a part of time image which should be horizontal or vertical (like an edge or a line of text).

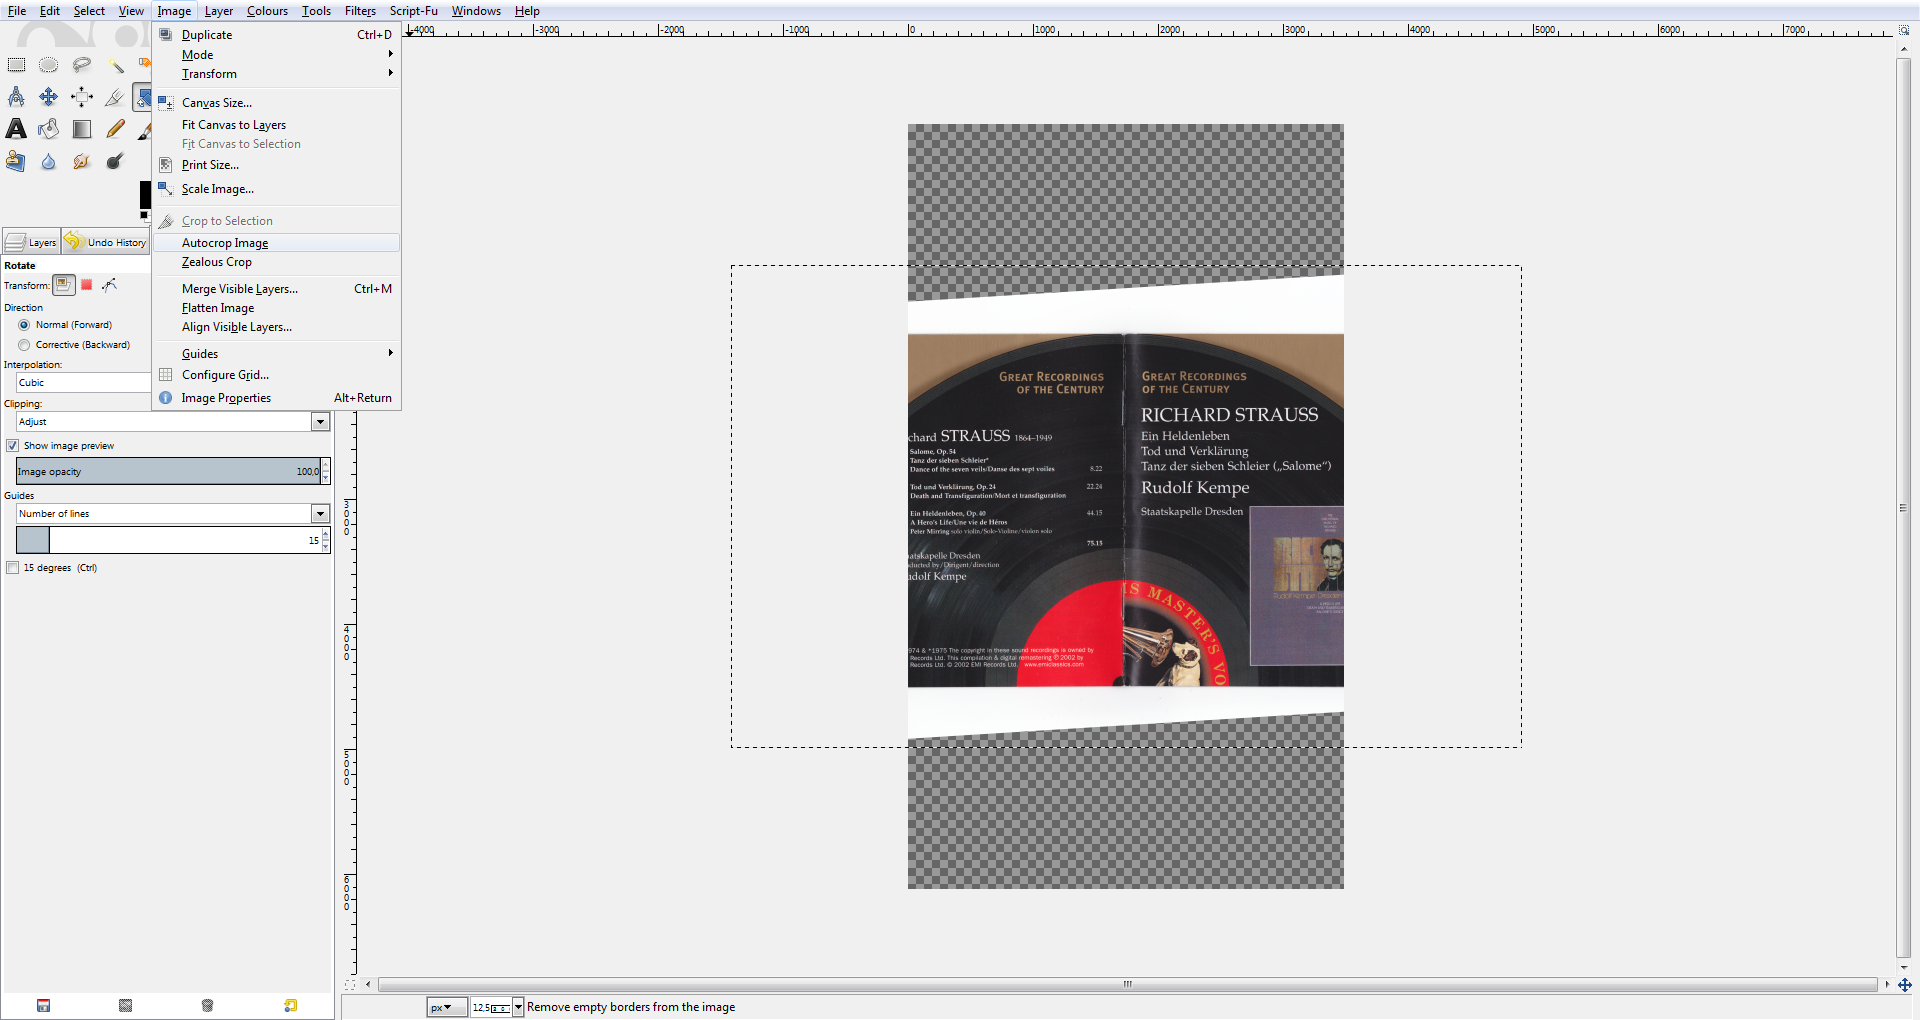
When you zoom out again, you’ll notice that some bits are missing. Image → Autocrop Image will solve that problem.
