How to Add an Artist
Relevant video:
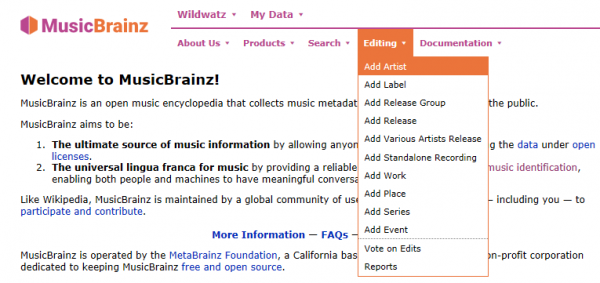
Pretty soon in your editing you might find that the artist you want to add information to is still not in MusicBrainz. Note that there might be a different artist with the same name - if you don't recognise anything you see in that artist page, it's probably not the one you want! Once you're sure the artist is not in the database, it's time to add it! For that, select "Add artist" in the "Editing" menu in the top bar (or click here):
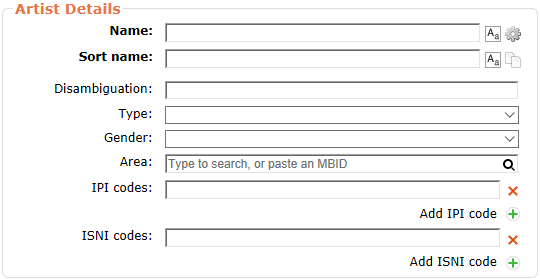
This will take you to a page with a form like the one in this image:
The first field is for the name. This one is usually as straightforward as it sounds.
The second field is for the sort name. This one can get trickier, but for most legal names it will be "Surname, Name", and for most other names it will be the same as the artist name, but with any articles at the end. You can see the actual guidelines in Style/Artist/Sort Name.
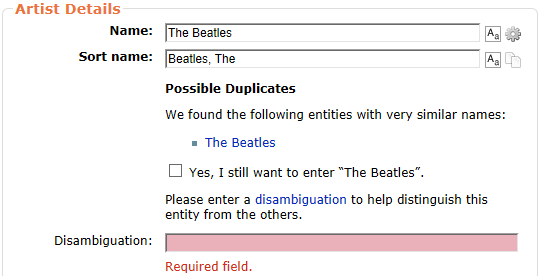
The Disambiguation field is used to distinguish different artists with the same name. If there's already an artist with this name in MusicBrainz, you will be informed that you must enter a comment. Try to make it useful! A short description of the artist (like "British metal band") works best. If there's no other artist with the same name, you can leave this blank.
You can see an example of these three fields in action for a hypothetical new "The Beatles" band, including the message you'll be given because there's already a The Beatles in MusicBrainz:
Note that it will ask if you are sure the artist is not duplicate. If you are not sure, but strongly suspect it's a different one, it's better to still add a new artist - they can always be merged later! But try to avoid adding new artists without doing a bit of research.
Now, on to the other five fields in this part of the form! None of these are mandatory, but all give useful information.
The first one is type. There are six types: "Person", "Group", "Choir" and "Orchestra" (which should be pretty straightforward), Character (for fictional characters) and "Other" (for those less straightforward cases where neither of the other options fits).
Next comes gender. This (obviously) doesn't apply for groups, and it is the gender the artist identifies with - which tends to be the same as their sex, but isn't always so.
Then we get to the area. For people, this is usually where they were born and raised, and for groups where they were formed. If the artist is mostly active in another country (for example, because of moving to a second country when they were young and having all their musical activity in it) choose that one instead.
Next is the IPI. This is an identifying code for the artist, used in the music industry for, for example, work attribution, and it's usually only findable in rights organisations' databases. It's generally safe to skip, but if you know it (because you're the artist, for example), enter it!
Last but not least comes the ISNI. This is the International Standard Name Identifier for the artist, used to disambiguate between names that might otherwise be confused. Like the IPI, this is safe to skip if you don't know it, although if the artist has been assigned one, it can often be found out relatively easily on the official website.
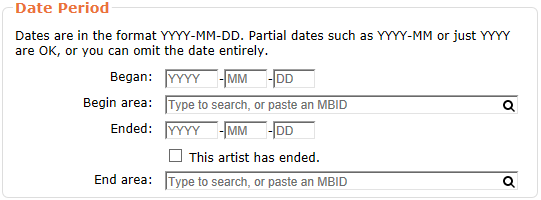
Next is the dates section!
The dates have different meanings for artists of the type Person and Group (or Choir/Orchestra). For people, they are the birth and death dates, not the dates in which a specific performance name was used. For groups, they're the date of original foundation and of last disbanding - if the group disbanded but then reunited, leave the end date blank. The same goes for the areas; birth and death areas for single persons and foundation/disbanding areas for groups.
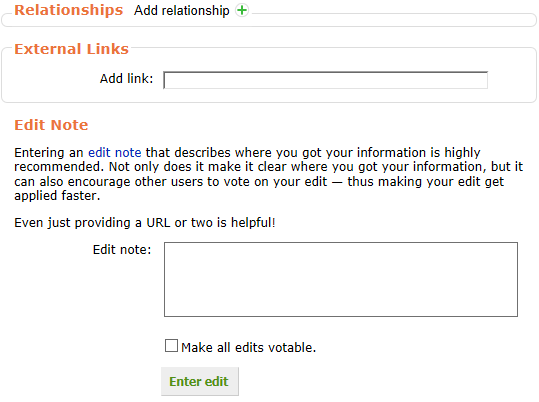
You can also add URLs (web pages, for example the official artists' page) and other relationships before you finish adding the artist. These are not required (although an artist without relationships or releases will be auto-removed, see below). For more info on how to do this, see our specific guide about relationships.
Relevant video:
If you're creating a new group (or band) page, adding relationships is how you add group members.
Now you should be done! Add an edit note (if you're the artist or a member of it, say so!) and press "Enter edit".
After creating your new artist you'll see the following (unless you've added some relationships while creating it):
If you see this, it means you're still not done! You'll need to add a release to your artist, or at least some relationships, to ensure it's not removed because of being empty.
| How-To Pages | |
|---|---|
| Introductory Guides | Beginners' Guide · Creating an Account · Editing · Voting · Writing Edit Notes |
| Basic How-Tos | Adding an Artist · Adding Relationships · Using the Relationship Editor · Using Artist Credits · Adding a Release · Works · Events · Places · Series · Instruments · Areas |
| Specific How-Tos | Merging Releases · Merging Recordings · Removing Entities · Adding Cover Art · Identifying Labels · Splitting Artists · Adding Standalone Recordings · Adding Disc IDs · Cancelling Edits · Searching for Edits · Reporting a User · Reporting an Issue · Working with AcoustIDs · Tagging Files with Picard |
