How to Submit Analyses to AcousticBrainz: Difference between revisions
No edit summary |
No edit summary |
||
| Line 5: | Line 5: | ||
* Last but not least, the AcousticBrainz analyzes are submitted. |
* Last but not least, the AcousticBrainz analyzes are submitted. |
||
This step is the last step, because all files need to have |
This step is the last step, because all files need to have a [[MusicBrainz_Identifier| MBIDs]] to be able to get analyzed for [http://acousticbrainz.org AcousticBrainz]. MBIDs are automatically added when the files are tagged with Picard (that's why this has to be done before). In the following there are two ways described, how to analyze and submit those analyzes to AcousticBrainz. |
||
== AcousticBrainz Analyze (GUI, only for Windows) == |
|||
== Adding AcoustIDs == |
|||
For this, [https://acousticbrainz.org/download AcousticBrainz-GUI] is needed. |
|||
If no AcoustIDs were created through Picard, you have to use the [https://acoustid.org/fingerprinter AcoustID Fingerprinter] to do this. This works as follows: |
|||
| ⚫ | |||
| ⚫ | |||
Put all the files in one folder and select this folder in the Fingerprinter: |
|||
[[File:Fingerprinter1.png|300px]] |
|||
| ⚫ | |||
| ⚫ | |||
Then click "Fingerprint..." and wait until the process finishes: |
|||
[[File:Fingerprinter2.png|300px]] |
|||
| ⚫ | |||
| ⚫ | |||
As soon as all the files have their related MBIDs and AcoustIDs, you can continue with the next step. |
|||
== AcousticBrainz Analyze ( |
== AcousticBrainz Analyze (Command line, Linux) == |
||
For this, [https://acousticbrainz.org/download AcousticBrainz |
For this, an [https://acousticbrainz.org/download AcousticBrainz Client] for Linux is needed. |
||
| ⚫ | |||
Download the client according to your OS-Type and extract it. |
|||
| ⚫ | |||
Now open the extracted folder and create a folder named whatever you like, in this example it is "Music". Put all files you want to analyze in this new created folder. |
|||
[[File:Analyze_Linux1.png]] |
|||
| ⚫ | |||
Open the (abzsubmit) folder in the terminal and use the following command to analyze and submit all the files in the "Music" folder: ''./abzsubmit Music'' |
|||
| ⚫ | |||
[[File:Analyze-Linux2.png]] |
|||
Now wait until the process is finished. |
|||
| ⚫ | |||
| ⚫ | |||
After that, you basically completed the whole process of adding a release/recording. |
After that, you basically completed the whole process of adding a release/recording. |
||
Revision as of 17:06, 3 January 2017
When adding a release or a single recording to MusicBrainz, it is recommended to submit AcousticBrainz analyzes for all of the added material too. This How-To explains this process as part of the (usual) workflow:
- At first, the release or recording is (manually) added in MusicBrainz.
- After that, the relevant files (recordings) are tagged with picard.
- Last but not least, the AcousticBrainz analyzes are submitted.
This step is the last step, because all files need to have a MBIDs to be able to get analyzed for AcousticBrainz. MBIDs are automatically added when the files are tagged with Picard (that's why this has to be done before). In the following there are two ways described, how to analyze and submit those analyzes to AcousticBrainz.
AcousticBrainz Analyze (GUI, only for Windows)
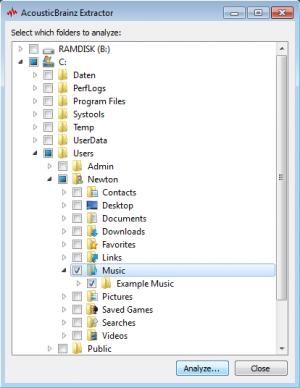
For this, AcousticBrainz-GUI is needed. Open acousticbrainz-gui.exe and select the folder with the files (should be the same folder) and click "Analyze...".
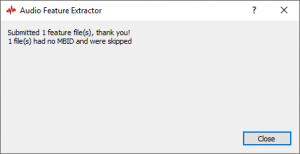
Now wait until the process is finished:
 Note: This may take a while, so make sure to have a stable internet connection and preferably don't do anything else during this time on your computer.
Other than this, you have to do nothing, because the program automatically submits the analyzes to the AcousticBrainz server when you are connected to the internet.
AcousticBrainz Analyze (Command line, Linux)
For this, an AcousticBrainz Client for Linux is needed.
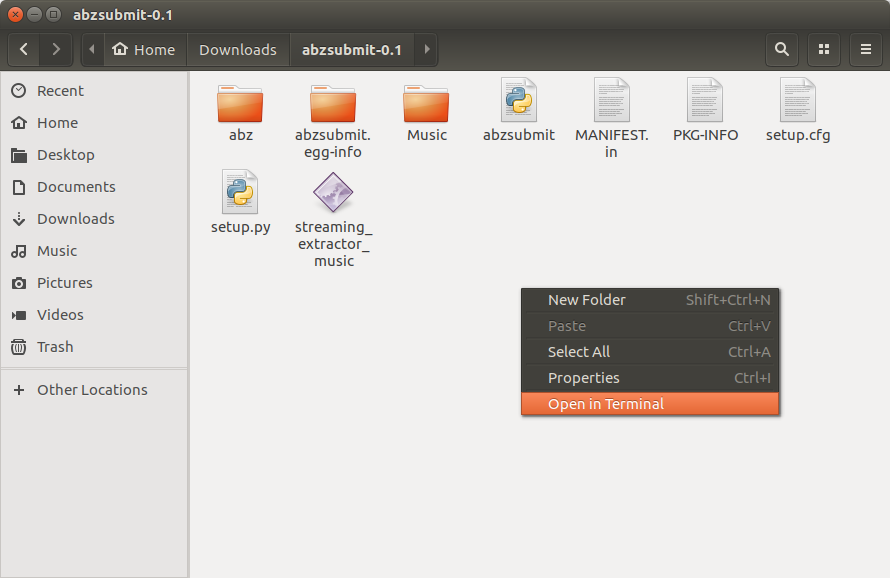
Download the client according to your OS-Type and extract it. Now open the extracted folder and create a folder named whatever you like, in this example it is "Music". Put all files you want to analyze in this new created folder.
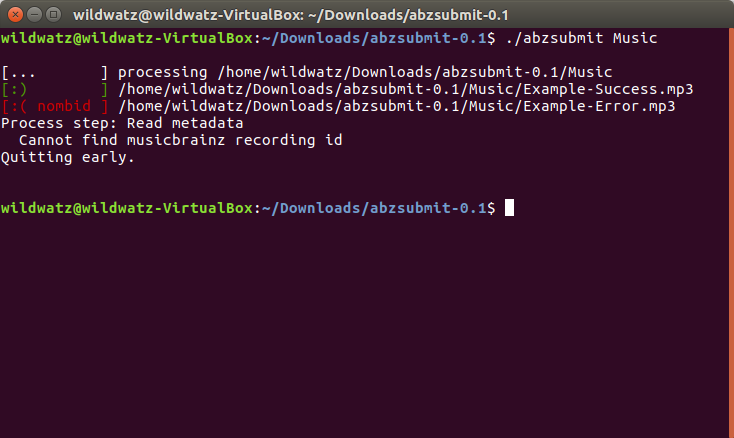
Open the (abzsubmit) folder in the terminal and use the following command to analyze and submit all the files in the "Music" folder: ./abzsubmit Music
Now wait until the process is finished.
After that, you basically completed the whole process of adding a release/recording.
| How-To Pages | |
|---|---|
| Introductory Guides | Beginners' Guide · Creating an Account · Editing · Voting · Writing Edit Notes |
| Basic How-Tos | Adding an Artist · Adding Relationships · Using the Relationship Editor · Using Artist Credits · Adding a Release · Works · Events · Places · Series · Instruments · Areas |
| Specific How-Tos | Merging Releases · Merging Recordings · Removing Entities · Adding Cover Art · Identifying Labels · Splitting Artists · Adding Standalone Recordings · Adding Disc IDs · Cancelling Edits · Searching for Edits · Reporting a User · Reporting an Issue · Working with AcoustIDs · Tagging Files with Picard |


